Galatea, my solo journaling game about the pressure of perfection, unrealistic expectations, and trying to keep up a beautiful facade even as you slowly fall apart, first released on July 15, 2022 on itch.io. At the time it was the prettiest PDF I had ever made. As time went on, however, and my design skills – and taste – improved, it became clear to me that Galatea needed a visual overhaul for its print version if I wanted a product I could be proud of.
Now that Galatea: Paragon Edition has been released and is available in print from several retailers, I’ve had time to reflect on what I’ve learned about updating an 8.5″x11″ PDF to a physical A5 zine, quirks of the physical manufacturing process, and principles of visual design and layout for TTRPGs in general.
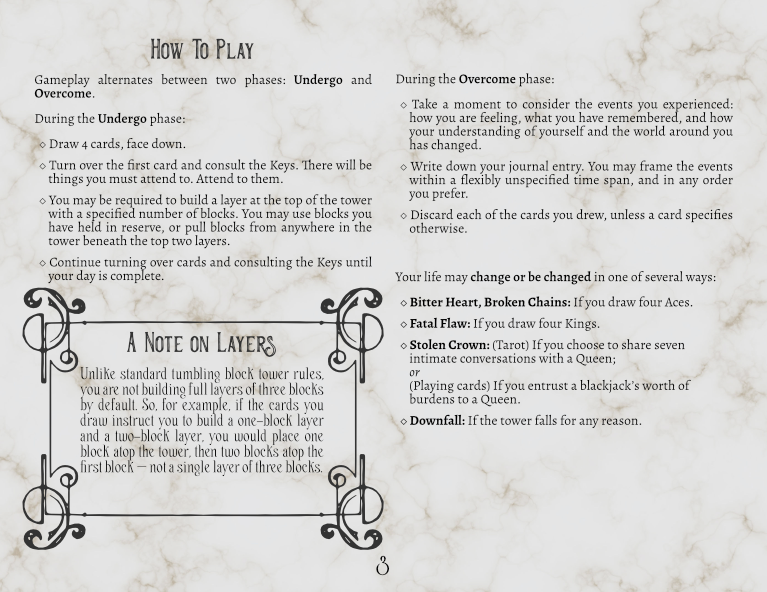
Paper Size
My first few TTRPGs were created as 8.5″x11″ PDFs. It was the only default I knew, and I thought people might want to print the games out at home. The print standard for zines, as I now know, is overwhelmingly A5 (approximately 5.8″x8.3″) or digest (5.5″x8.5″). Other sizes are often more expensive to print, presumably because of the cost of non-standard-sized paper.
I could have tried to convert my 8.5″x11″ pages directly to digest size – after all, in my original landscape-orientation PDF, I had laid out each page with two columns that essentially mimicked a digest-sized spread. However, although this layout might have looked like two pages at a glance, it was not actually optimized to be a spread. There wasn’t nearly enough white space between the two columns for real individual pages, as you can see from the screenshot below. The binding process would have eaten dangerously into the center of each spread.
I chose to migrate the text into an A5 zine instead, gaining a little more page width and losing a little height. This is an oversimplification of the process, of course – the font, size, and spacing of the body text were also changed, not to mention revising some of the text and adding more art, so it was more involved than just moving the text boxes from one size of page to another – but the document size was a fundamental, foundational choice atop which every other design choice rested.

Cover Design
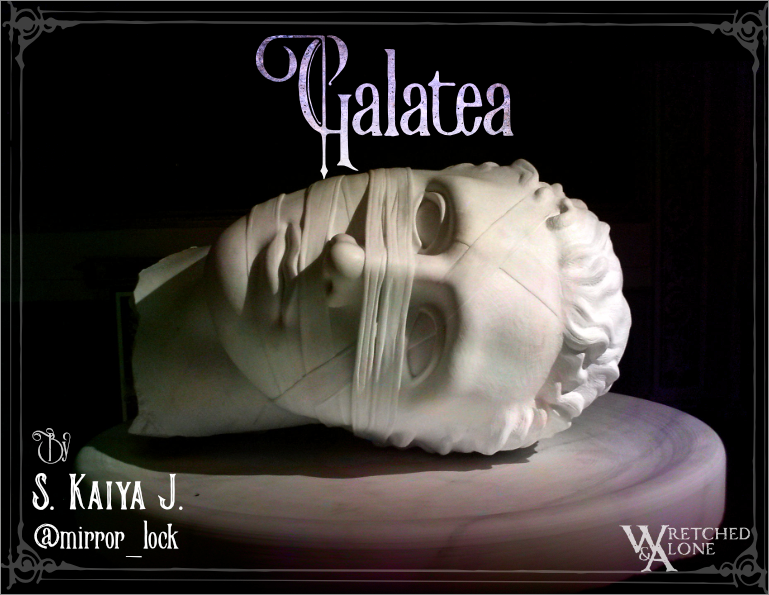
The original cover had to go for two reasons. First, the original cover was, of course, still in landscape orientation, and I now needed a portrait-orientation cover. And second, I had become embarrassed of it. I had found the original cover art (free for commercial use on Pixabay) to be poignant and evocative, and as a piece of art, it still was – but I was no longer happy at all with the other elements that I had put on top of it. They felt cluttered, scattered, disunited in tone, and overall very amateurish. It was time to find a new piece of art that encapsulated the spirit of the game.
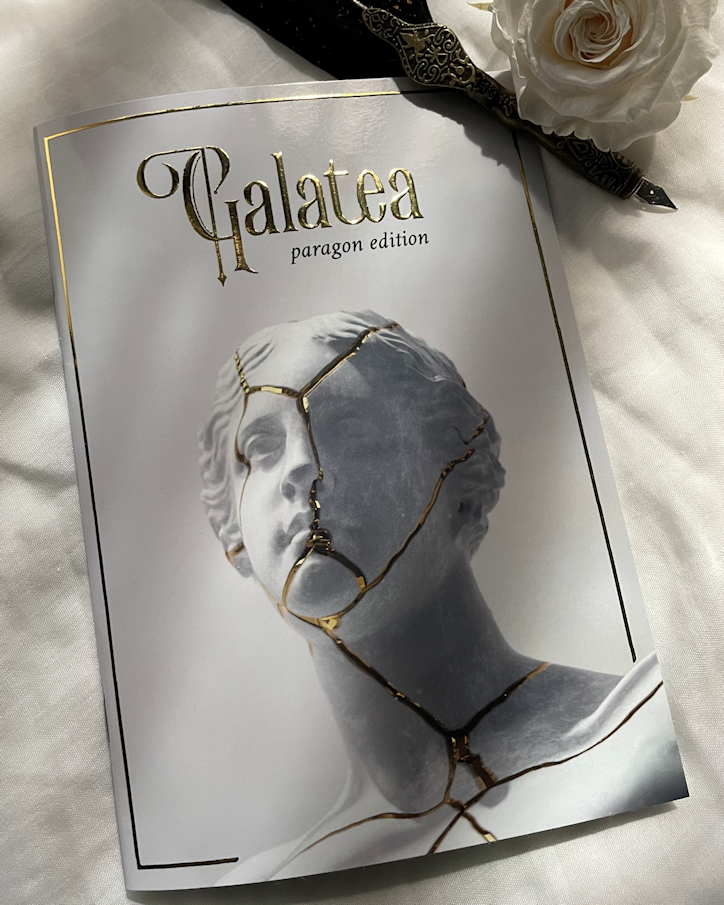
I was exceptionally fortunate to find a gorgeous 3D-modeled piece (also free for commercial use) by Simon Lee. However, the proportions weren’t exactly correct for the A5 cover. It’s conventional wisdom in TTRPG design to put the title of the game in the top third or quarter of the cover, so that it can be seen at a glance in the middle of a tiered display of many zines. That meant the art of the statue needed to be moved down underneath the title, which in turn meant that the top of the piece of artwork didn’t quite stretch to the top of the cover. There was a big rectangle near the top of the cover that I had to manually color-match to the background grey of the art, which was a subtle gradient, as best I could.
I was happy to make this tradeoff, honestly. Bespoke art for my TTRPGs is generally beyond my budget, and I pride myself on being able to find human-made, free-for-commercial-use pieces that build the aesthetic tone I want to set, both on my covers and my interior art.
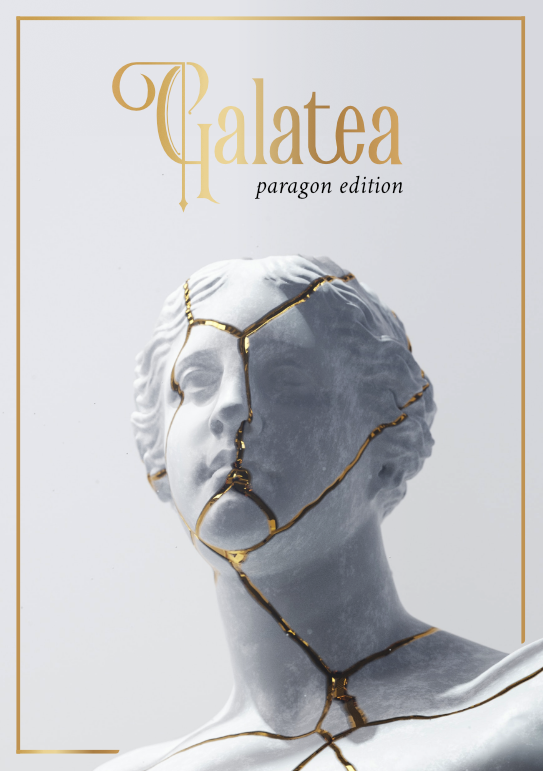
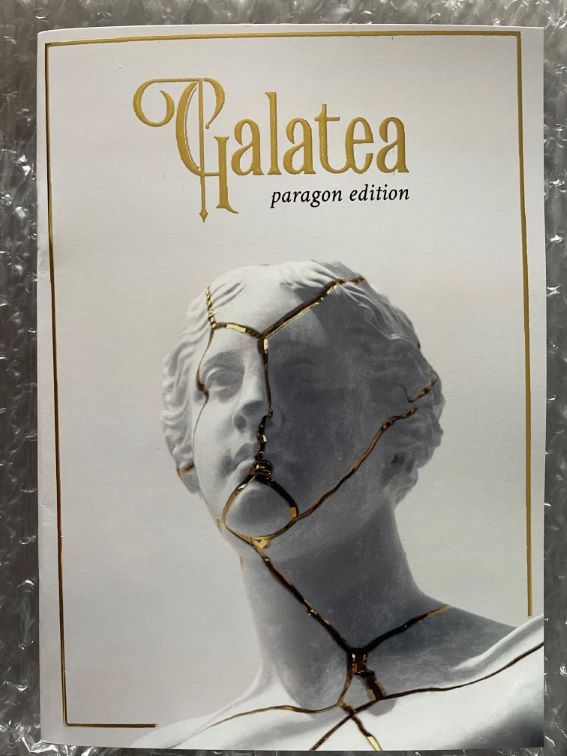
Looking at the golden elements in the new art, I became increasingly enamored of the idea of getting gold foiling for the cover to match. This was a risky decision, and several well-meaning friends and colleagues tried to convince me to drop the idea. Having ignored them and gone ahead with the idea anyway, I can confidently say now: it made the process more complicated, and my feelings about it are likewise complicated. Whether or not it was worth it, I’m still not sure.
The foil does make the product more eye-catching, as I had hoped, and stands out in a sea of other self-published zines, although I’m not sure exactly to what extent it’s made people more interested in browsing and/or buying. However, the glossiness of the foil also makes the cover a lot harder to photograph – it really wants to capture the reflection of the camera and the person taking the picture!
Setting up the PDF to designate which areas should be foiled proved to be tricky for me as someone without any formal print experience. The printer’s website had a step-by-step visual guide to setting up a spot color layer, but the guide was for Adobe InDesign, and I use Affinity Publisher. I wasn’t nearly familiar enough with the terms and functions involved to know where to look or how to translate the steps across programs. Luckily, Matthew of AbyssalBrews is, and he helped me set up and export the cover PDF, but not everyone setting out to make a gold-foiled zine will be fortunate enough to have a friend who’s an experienced graphic designer.
The foil also made the economics of ordering copies more complicated. This is because, unlike the standard model where the printer essentially just charges a price per copy, gold foiling added a flat $275 fee no matter how many copies were in the print run. Buy two hundred copies at, say, $3.00 per copy? That’s $600 for the base print fee plus $275 for a total of $875. Want to buy a single copy as a print proof? That’s a $278 proof. Under this model, it’s clearly more economical to buy one big print run rather than several small ones in a row – but that also means I had to take an upfront gamble with my own cash on how many copies I thought I could sell and how many I was willing to sit on.
In addition, the foil had unforeseen knock-on effects on the rest of my design. The original cover had the “Galatea” wordmark in a font that was intentionally kind of wobbly and not fully filled-in, for a weathered old-printing-press effect. Once I decided on gold foil, I had to switch to a smoother variation of the font, because those tiny weathered effects would just look like defects in the foiling process. Switching title fonts was unexpectedly complicated; the original title was an image file that Matthew had customized to correct some shape and spacing issues with certain letters. I spent certifiably too much time trying to replicate that spacing myself with the new font variation, turning letters into vector shapes and adjusting nodes.
I also figured that since I was paying a $275 premium for the foiling anyway, I should take advantage of the opportunity to add some more decorative elements to the cover, like simple gold box frames on the front and back. This has been the mistake I have regretted the most throughout this process. The presence of these thin, geometric, symmetrical lines near the edge of the cover has magnified every little flaw and quirk in the printing process, making it immediately obvious if a cover was cut a little bit crooked or offset a few millimeters more to one side than the other. I have dozens of copies that are relegated to my defect bin for having visibly off-center covers, flaws that literally no one would have been able to detect if there had been no frame. Never again.
Cover Finish
This was an area where, having never had to consider these options when I was just making PDFs, I felt overwhelmed and underinformed when it was time to make a print choice. Perhaps fortunately for me, opting for the gold foiling meant that the only options I had for the cover finish were “matte lamination” or “gloss lamination”. I opted for the latter, and while the books are now appealingly shiny, it adds to the difficulty in photographing one of them without getting a reflection of the camera, the photographer, or the brightest light source around.
I’ve since learned that there’s no industry-wide consensus on what kind of cover finish is best – all of them have their drawbacks and tradeoffs. Paul Czege cautions that lamination is prone to cracking and peeling over time, which is why he chose unlaminated covers for his zine The Ink That Bleeds. According to Ayo of Knave of Cups, soft-touch covers, one of the other popular choices, aren’t worth it either as they attract dust and tend to chip. Uncoated satin sounds like the most middle-ground option, and will likely be what I try out for my next TTRPG project.
Ordering
I ordered two rounds of proofs (without gold foiling!) before placing my big print run order. I’m very glad I did. Seeing a print proof gave me a much better idea of how vivid the printed colors were, how large and readable the words were, how distinctly the text showed up against the background art, and a thousand other tiny details that don’t translate directly from screen to printed page, and I was able to adjust small details accordingly.
Ordering proofs did not, sadly, let me catch every single mistake in the text. There’s one reference to a page number that’s two pages off from what it should be, and that’s just something I’m going to have to live with in the first print run. The value of a print proof is only as good as the attention you’re paying to it, and I should have been paying more attention.
There’s plenty more I’ve learned about the TTRPG print process – about pricing and marketing and shipping, among other things – but this is a broad overview of the visual-design-centered lessons I’ve picked up along the way and a few things I wish I had known before I started. I sincerely hope what I’ve learned helps someone else out there on your own journey!
You can pick up a physical copy of Galatea at Knave of Cups, Tabletop Bookshelf, Indie Revolution Press – or buy a signed and customized imperfect copy straight from me.